This is a series of 3 Parts to talk about creating Oracle DB Project on Visual studio 2010, try to use it with some good features of the DB Project like refactor columns and lastly to use Automated Build with this project.
Part3: Do Automated Build with Oracle DB Project
Let’s Begin ![]()
I will be assuming here that you already have Oracle DB and you were successfully created your Oracle DB project and you can deploy to the DB normally – if not then please see my Part1 and Part2
- Right click on your project and choose “Unload project”
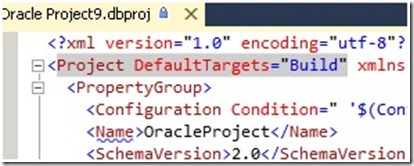
- Then right click the project again and choose “Edit {your project name}.dbproj”
- Change (ProjectDefaultTargets =” Build”) To (ProjectDefaultTargets=“Build;Deploy“)
- Save file
- Right click the project and choose Reload
- Now let’s do refactor again and change the column of Dep_ID to Dep_No_ID like the example we did in Part2
- Now check in without BUILD the project
- Go to the Team Explorer Tab
- Right Click Builds and choose New Build Definition
- for the example choose “Manual” in the trigger panel
- Now the coming part is the most important part
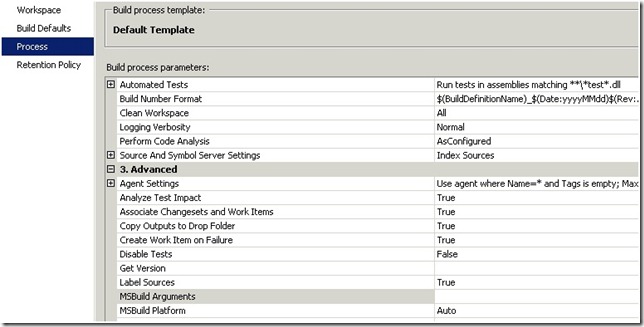
- In the process panel, expand advanced

- We will now put an argument that will be used by the build process to deploy the DB in the automated buil
- We need to add this in the MSBUILD Argument (change it to the right connection you have)
- /p:TargetConnectionString=”Data Source=ORCL;User ID=username;Password=UserPassword;Unicode=True”
- Save build
- Right click the build and queue it
Now you have successfully made Automated Build with Oracle DB Project
Tags: ALM , Oracle DB Project , Visual studio 2010 , Oracle , TFS , TFS2010 , Toad Extensions , DB Project , Automated Build


